yasserkabbout/tweeLights
Controlling Holiday Lights by a Twitter voting System API and a Raspberry Pi - IoT
😀 Welcome to tweeLights!
Each year, in living rooms and home-goods stores across the country the same battle unfolds: White or multi-colored lights? The battles are contentious with husbands and wives, neighbors and colleagues pitted against each other and searching for compromise.
In addition, this issue becomes bigger when major stores like Amazon, want to attract their customers during holidays. The choice of light colors may affect the customer's decision to visit or not to visit the store!
In order to solve this issue, and to have some fun, we decided to implement a system that controls the holiday lights' color by analyzing the social feeds and posts on twitter. Scroll down to learn how this project works!
Installation
🔧 What will you need?
- Raspberry pi 3 or 2
- Bread Board
- Jumper Cables
- 3 LED of different colors (Yellow, Green, and Red)
- Computer to code 😸
😵 How to configure it?
First, before we continue, you should have Raspberry Pi 3 Model B/B+ or a Raspberry Pi 2.
- Get a micro SD card of at least 8GB.
- Download the Raspbian image from the raspberry pi’s website and copy its content to the SD card.
- Insert the SD card within the raspberry pi 3.
- Connect the HDMI cable of your raspberry pi 3 to any suitable screen.
- Power the raspberry pi by plugging in the USB cable.
- Follow the steps to install the Raspbian system.
- Once the installation is done, connect to the internet through wifi or ethernet.
- Download the tweeLights.py python script on your raspberry pi 3.
- Insert the credentials of your twitter account through a txt file and name it “config.txt” and place within the same directory of tweeLights.py
consumer_key: [your key]
consumer_secret: [your secret]
access_token: [your access token]
access_token_secret: [your access token secret]- Install tweepy by
pip install tweepy - Run the Python script
python tweeLights.pyafter having the LEDs connected as mentioned within the section below. - The system will be working now
🚀Raspberry Pi and LED connections
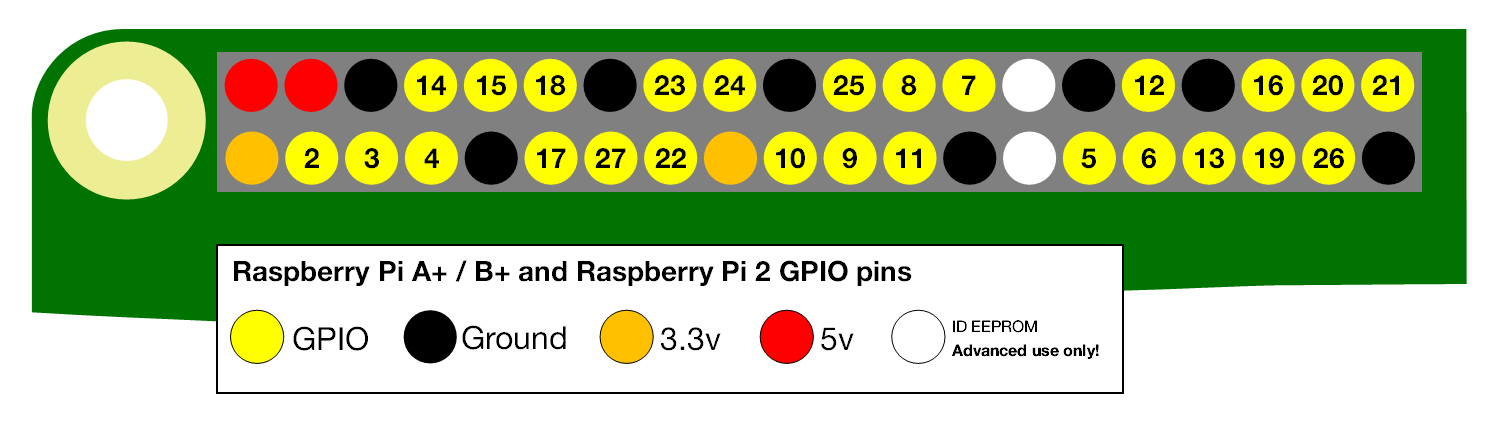
The pins used in this project are the Ground pin, GPIO 14, GPIO 15, and GPIO 18.
- GPIO 14 → Yellow LED
- GPIO 15 → Green LED
- GPIO 18 → Red LED
- The anode part of the LED will be connected to the ground pin.
🎓 Read More!
🚀 6. Project Complexity Analysis
💡 Help us improve!
- A template is provided if you would like to submit a Feature Request issue. Feature Request
- A template is provided if you would like to submit a Bug Report issue. Bug Report
📍 Releases
You can reach the first and second working prototypes (v1.0 and v1.1) by clicking here
👌 Contributing
- Fork it!
- Create your feature branch:
git checkout -b my-new-feature - Commit your changes:
git commit -am 'Add some feature' - Push to the branch:
git push origin my-new-feature - Submit a pull request :D
♥️ Credits
Credit goes to Yasser El Kabbout & Professor Dr. Suzan Üsküdarlı from Bogaziçi University.
😇 License
Nah! Don't worry about this :D feel free to use and edit the software.