disk91/snowcamp
Badge for snowcamp conference
Snowcamp badge workshop
This repository contains the program used during the Snowcamp 2026 workshop, a workshop I created together with Henri Gomez. Our goal is to introduce developers
to their first steps in the world of micro-electronics and connected devices using a small gadget — a badge that uses Bluetooth to identify people with shared
interests and initiate contact. Beyond this gadget, it’s an opportunity to explore the creation process, discuss microcontrollers, Bluetooth and other IoT networks,
board design, manufacturing, measurements… and to write a bit of low-power C code.
Step 0 - environment setup
Hardware environement
For this workshop, we chose to use a Nordic nRF52840 microcontroller, distributed as a module by Seeed Studio through their XIAO product line. Seeed Studio
supported us throughout this project, allowing each participant to leave the workshop with a badge. We selected the nRF52 for its BLE capabilities and its
very low power consumption, which enables long battery life using a simple and widely available CR2032 coin cell. Beyond supporting us in this endeavor,
Seeed offers a range of well-supported and well-documented products, making them easy to get started with, including in the Arduino environment.
Install Arduino
The project has been made with Arduino IDE 2.3.x.
You need to install the Xiao nRF52 envionement following the setup guide summarized here:
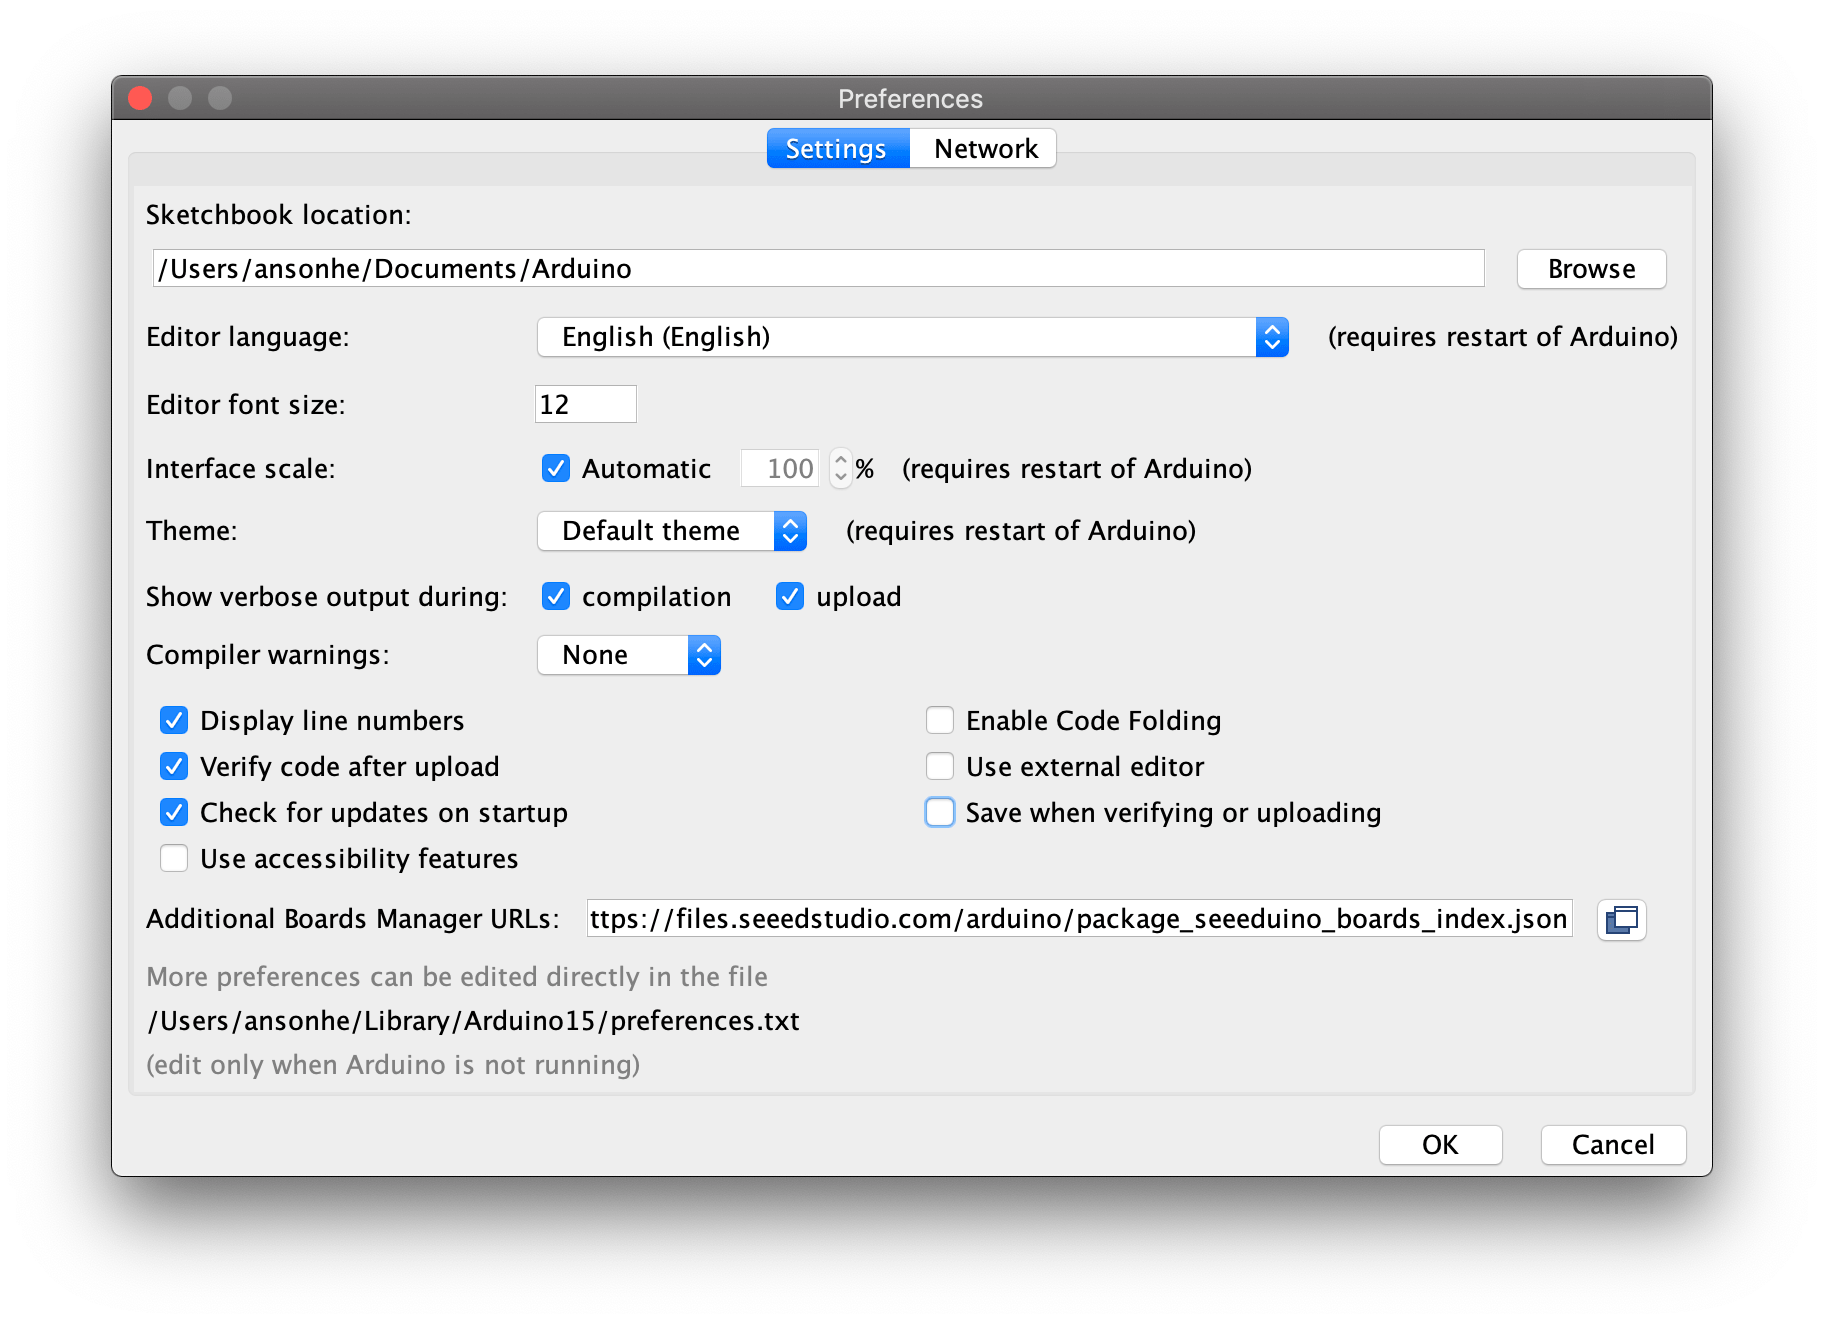
- Open Arduino IDE, go to File -> Preferences
- In the "Additional Boards Manager URLs" field, add the following URL:
https://files.seeedstudio.com/arduino/package_seeeduino_boards_index.json

Test your setup
To verify our setup is working correctly, we can upload a simple sketch that will make the built-in LED blink.
For this, open the Arduino IDE and go to File -> Examples -> 01.Basics -> Blink.
Upload the sketch to your board by clicking on the Upload button (right arrow icon).
If the built-in LED (near the USB connector) blinks, your environment is correctly set up!
After this first load, the bootloader is replaced by your sketch. To re-upload a new sketch, you need to double-click the reset button
(small button near the USB connector) and reslect the right port again from Tools -> Port menu.
Step 1 - make the badge blink
The first step is to make the 6 LEDs of our badge blink one after another to verify their proper functioning and our compilation chain.
We can also make the built-in LED on the module blink. We will light up the LEDs one after another with a 500ms delay between each LED.
Only one LED will be lit at a time. To do this, there are several Arduino functions we will use:
- pinMode(pin, mode): configures a pin as input or output (mode). To light up an LED, you need to configure the pin as output (OUTPUT)
- digitalWrite(pin, value): sets a pin to HIGH (5V) or LOW (0V). To light up an LED, you need to set the pin to HIGH.
- delay(ms): pauses the program execution for ms milliseconds.
The code corresponding to this step is tagged step-1
Step 2 - Meet & Geek
We will use the Adafruit Bluefruit nRF52 library to handle the Bluetooth Low Energy (BLE) part of our badge. This library
provides functionality to configure the module as a BLE peripheral and broadcast data via advertising. Normally,
this library should have been installed automatically when installing the Seeed nRF52 package. If not, you can install it
manually via the Arduino library manager (Sketch -> Include Library -> Manage Libraries...) by searching for "Adafruit Bluefruit nRF52".
Here, the objective is to broadcast your preferences (marked with a +) and what you don't like (marked with a -). To do this, we will
configure a list of topics by activating the lines that interest us in the "topics" array in the code. Each activated topic will be
broadcast via Bluetooth in what is called advertising that any Bluetooth device can see. Here, what we will do is regularly change
the device name to transfer this information to other devices.
In parallel, each device will memorize what each one likes or dislikes and calculate a matching score and a non-matching score. The
devices are identified by their MAC address so that they can be distinguished from one another.
Finally, when two devices are nearby, they will display their matching score through 1 to 3 green LEDs that will be lit or opposition
through 3 red LEDs.
When there is no one nearby anymore, the LEDs start blinking in a circular pattern to indicate that we are searching for contacts.
Steps to follow:
- Get the code tagged
step-2 - Modify the "topics" array to select your preferences and dislikes
const char topics[][TOPIC_SZ] = {
  "+JAVA",
  //"-JAVA",
  //"+PYTHON",
  "-PYTHON",
  //"+JSCRIP",
//"-JSCRIP",- Switch the device in boot loader mode by double-clicking the reset button (small button near the USB connector)
- Compile & upload the code to your badge
The code corresponding to this step is tagged step-2